


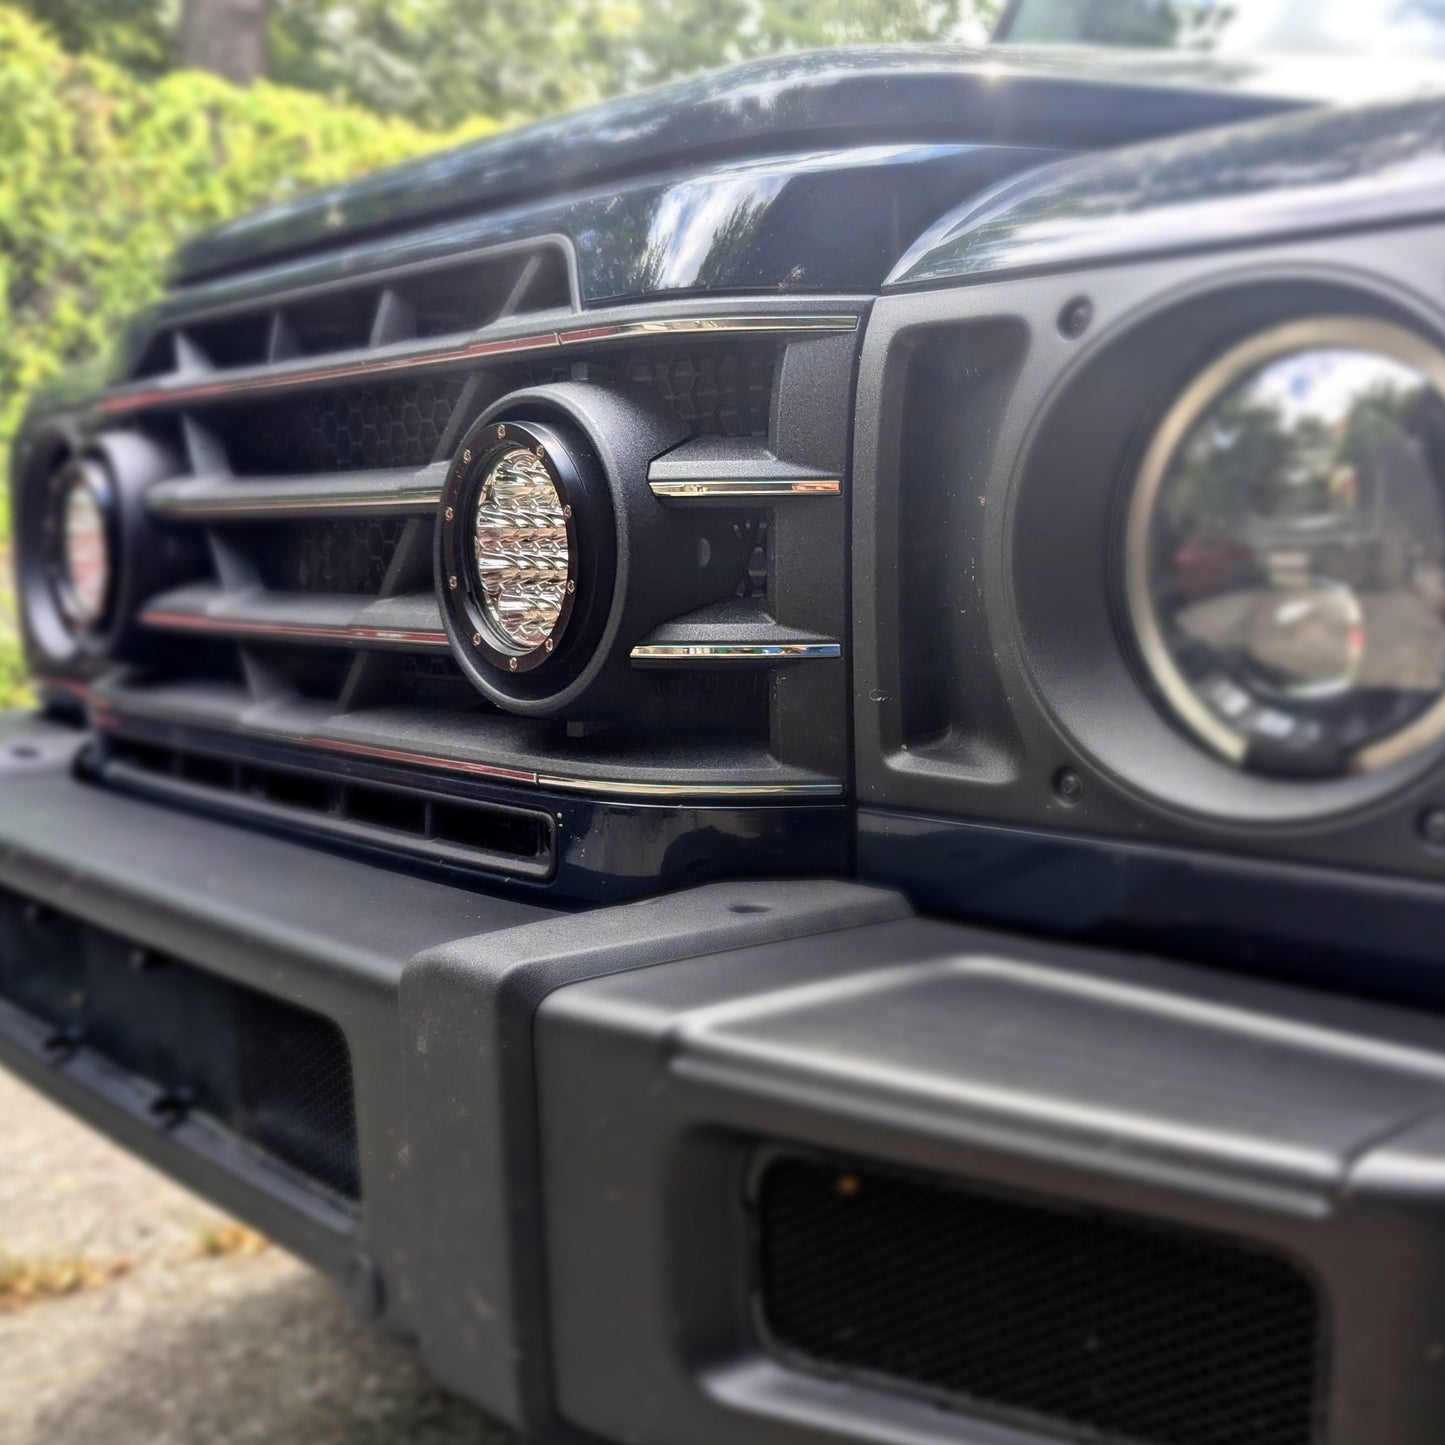
Auxiliary Light Mount Kit for Exzeit Lights
Auxiliary Light Mount Kit for Exzeit Lights
Updated design to accommodate the latest lamp version
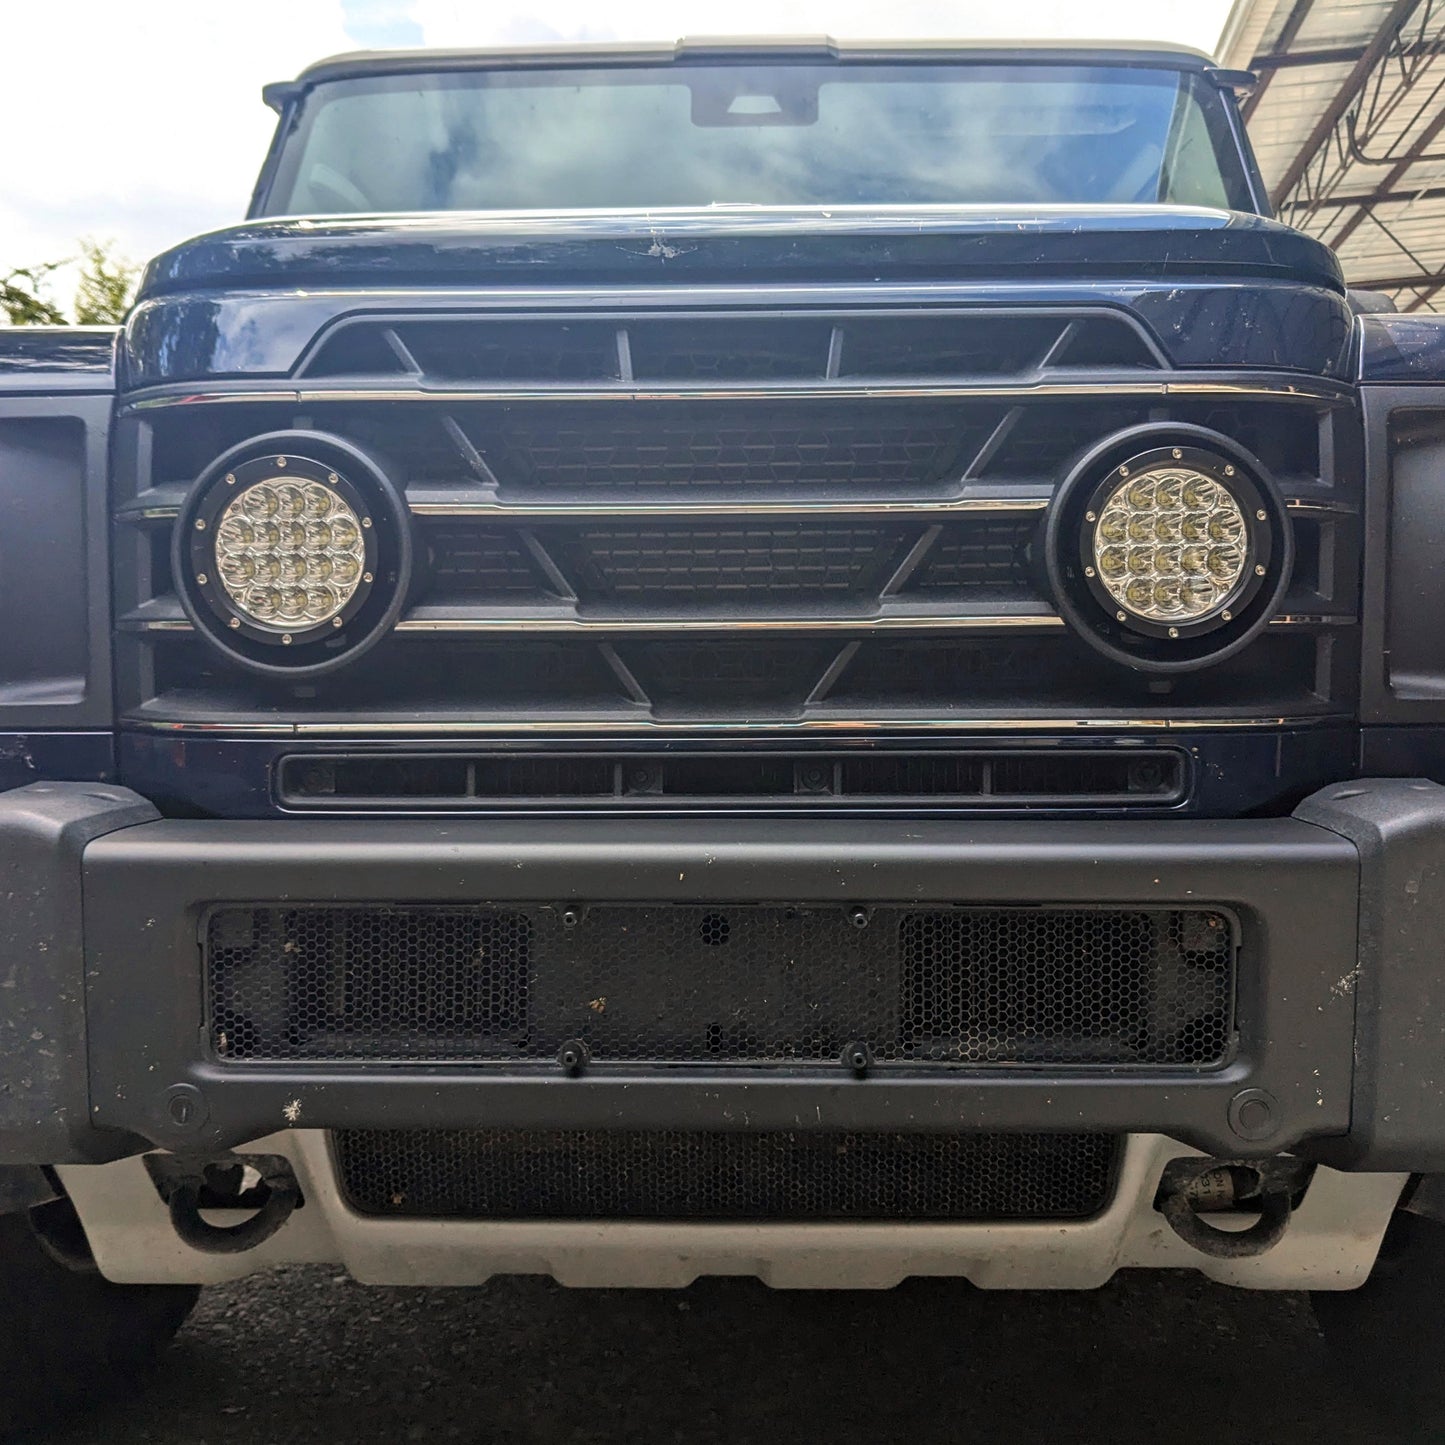
Purchase this kit and receive all the brackets, hardware, and instructions required to mount a set of Exzeit Lights (Lights not included) into the stock driving lights location on your Grenadier.
This product came to life from the ideas and feedback of our amazing members at theINEOSforum. Thank you to all who contributed, your input is valued greatly. Part of the proceeds goes to the upkeep and continued improvement of the forums. Read the origin story - theINEOSforum.
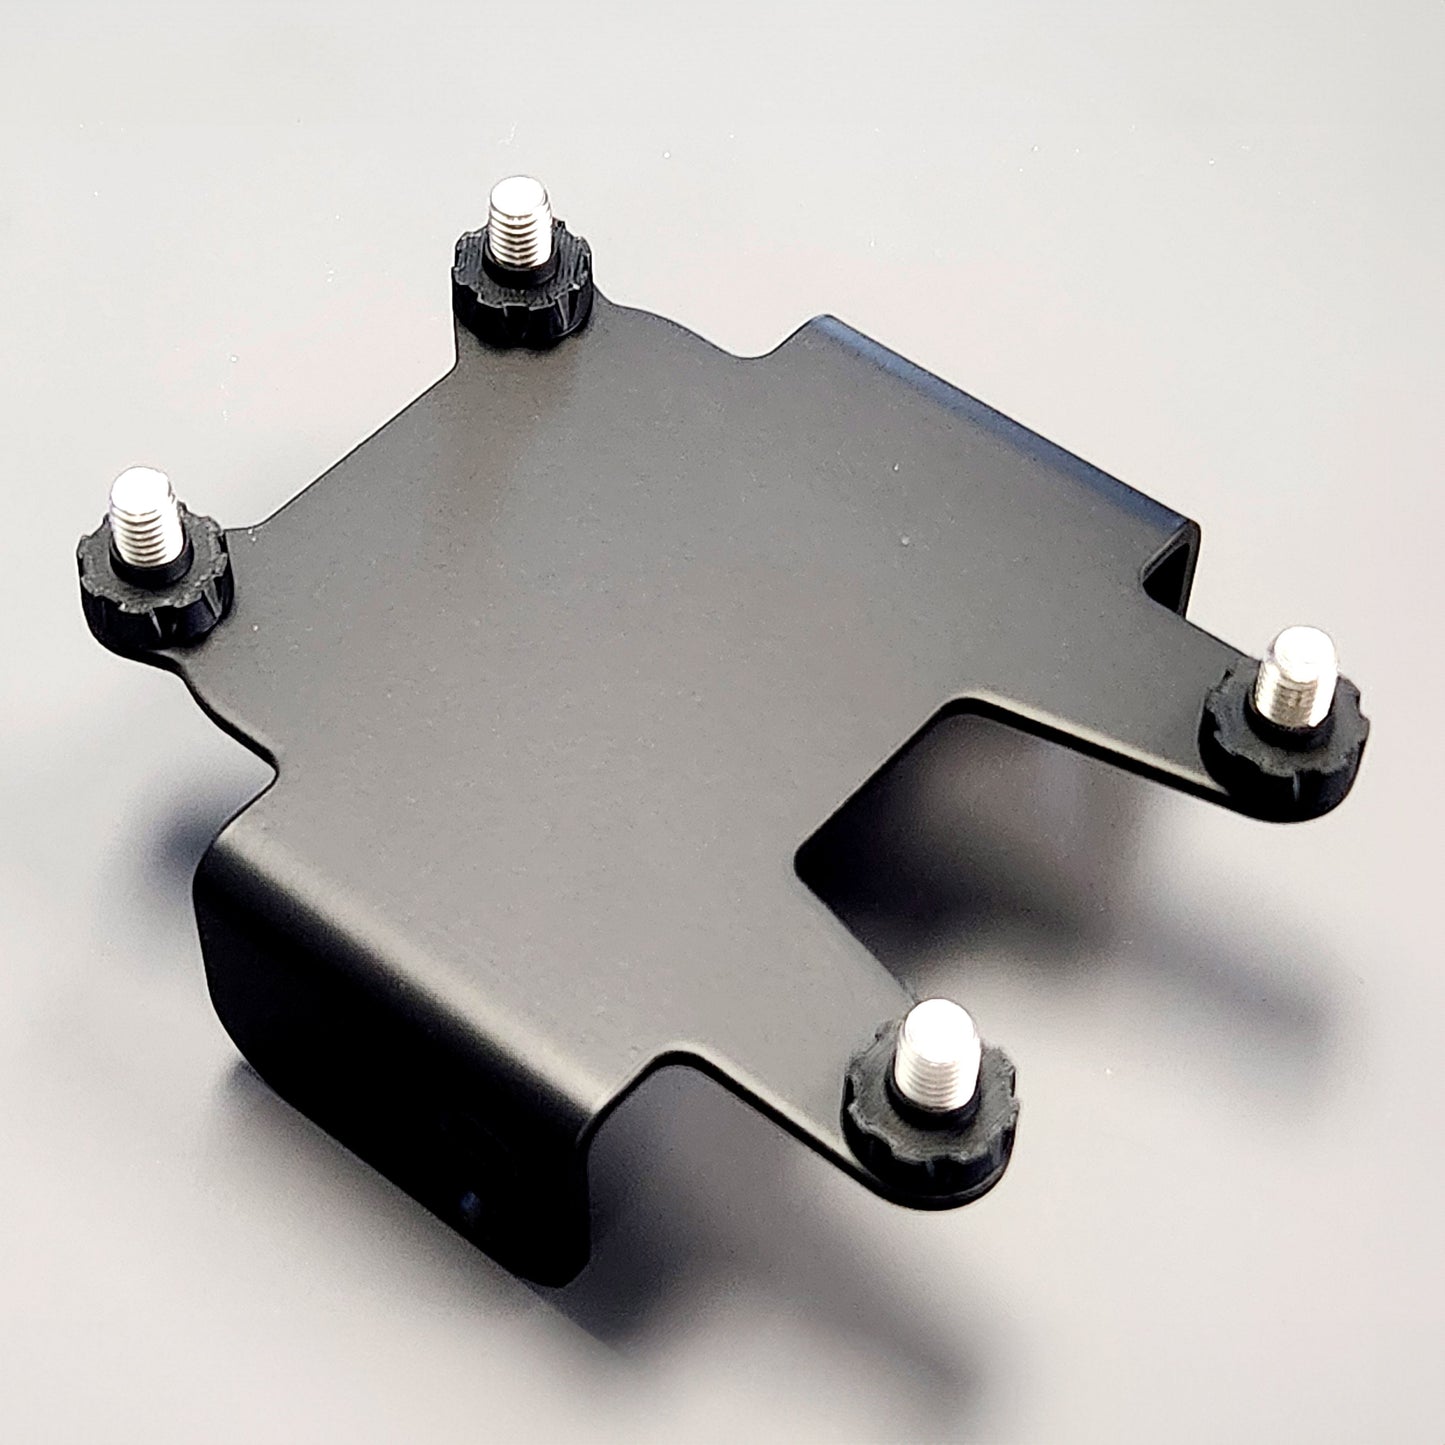
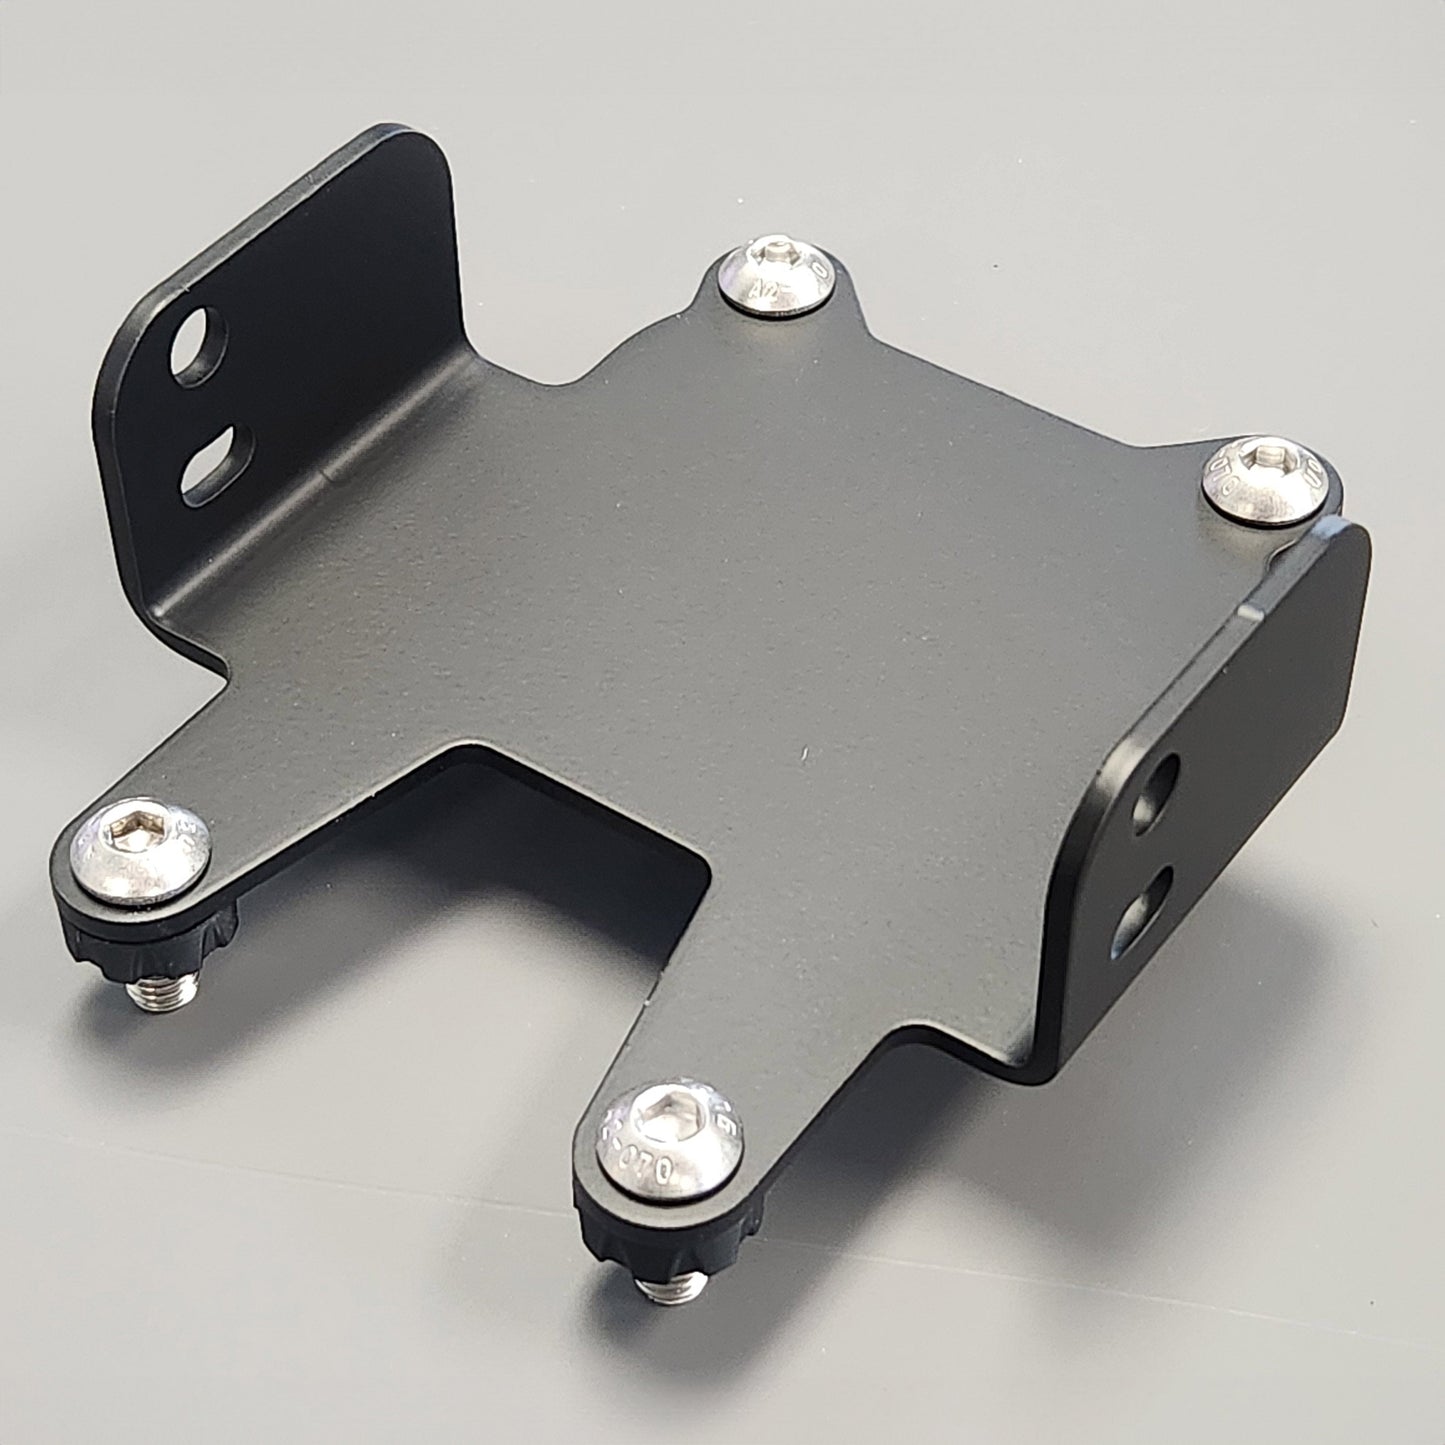
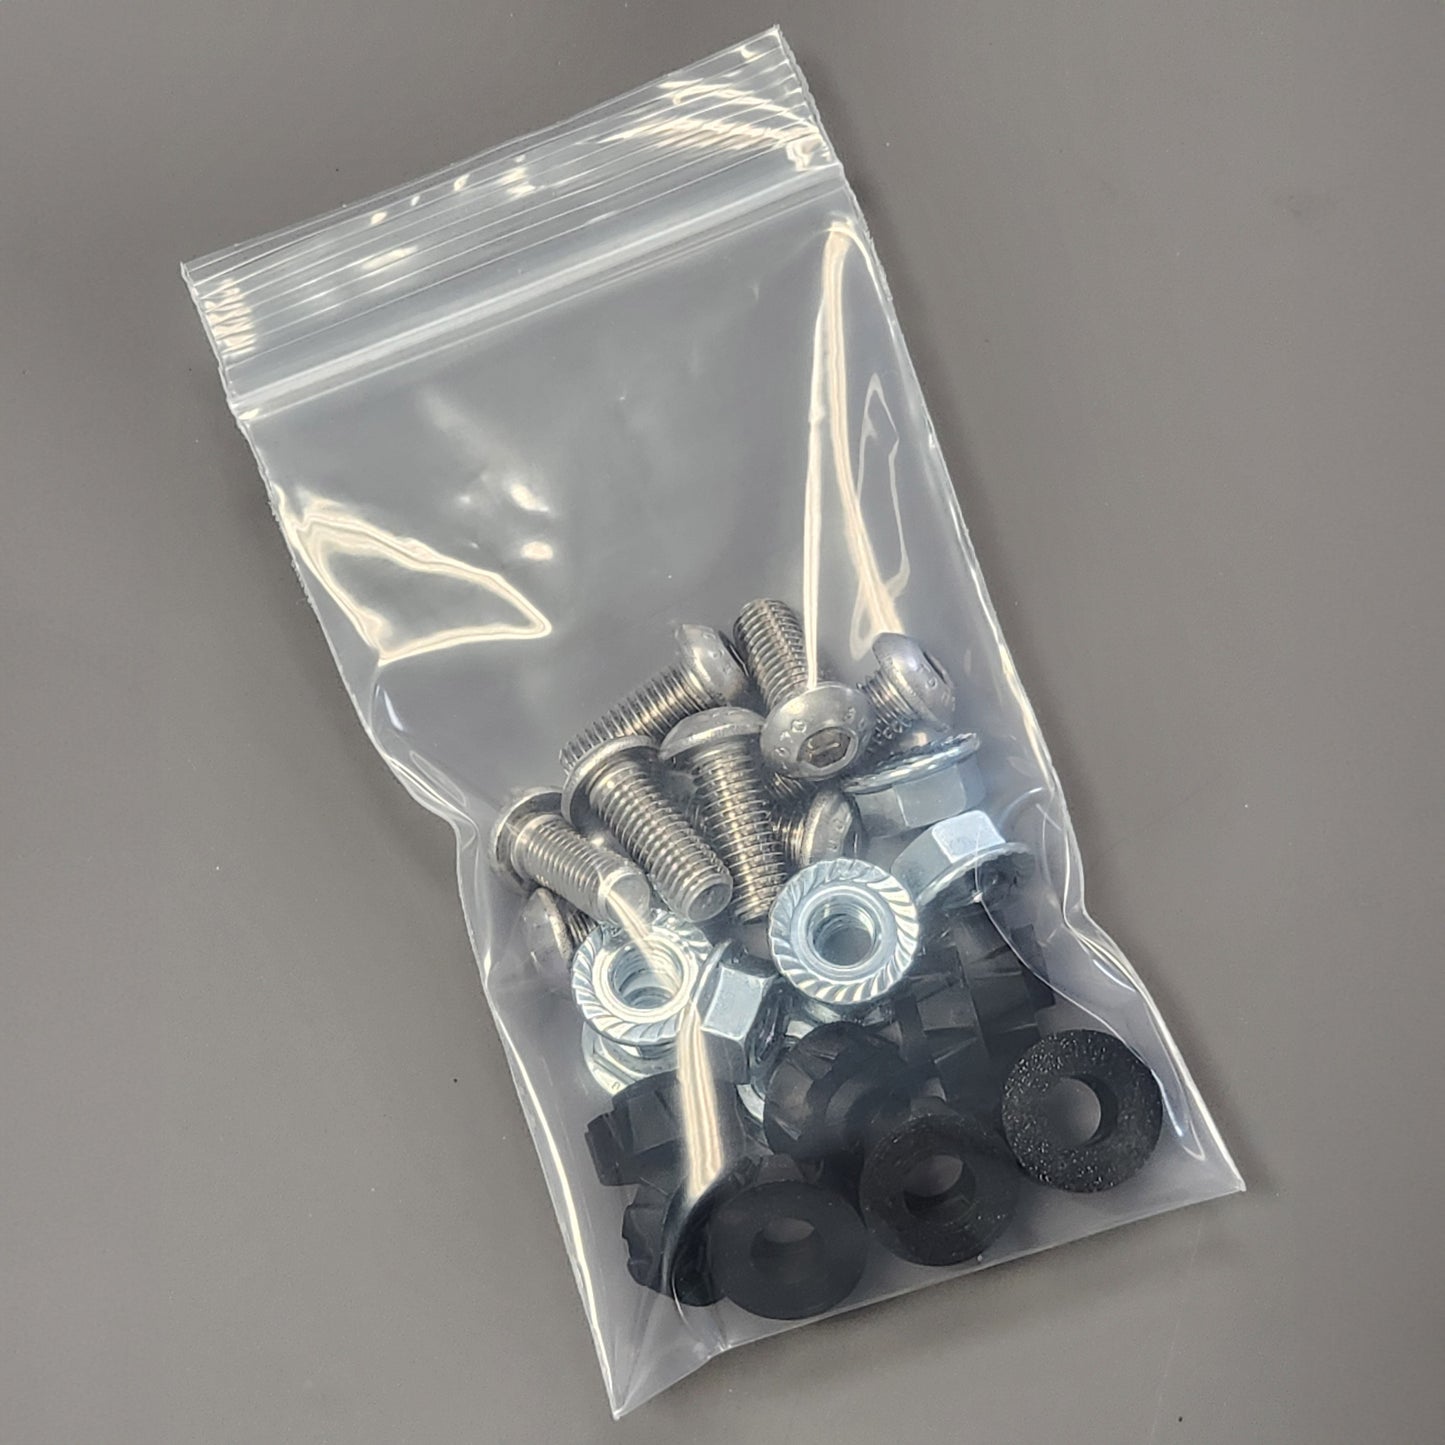
Kit Includes:
2x Mount Brackets, identical (Black Powder-Coated)
8x Button-Head Screws (M8, Stainless)
8x Hex Nuts (M8, Serrated, Zinc-plated)
8x Spacers (ABS plastic)
DOES NOT Include:
Exzeit Lights - Lights must be sourced separately
Click Here For Installation Instructions
Couldn't load pickup availability
Share
Collapsible content
Installation Instructions
Tools needed:
T25, T30, T40 Torx driver
Screwdriver, Phillips/Cross/Plus
Plastic Trim Removal Pry tool
Xmm Allen Hex driver
Xmm socket/driver
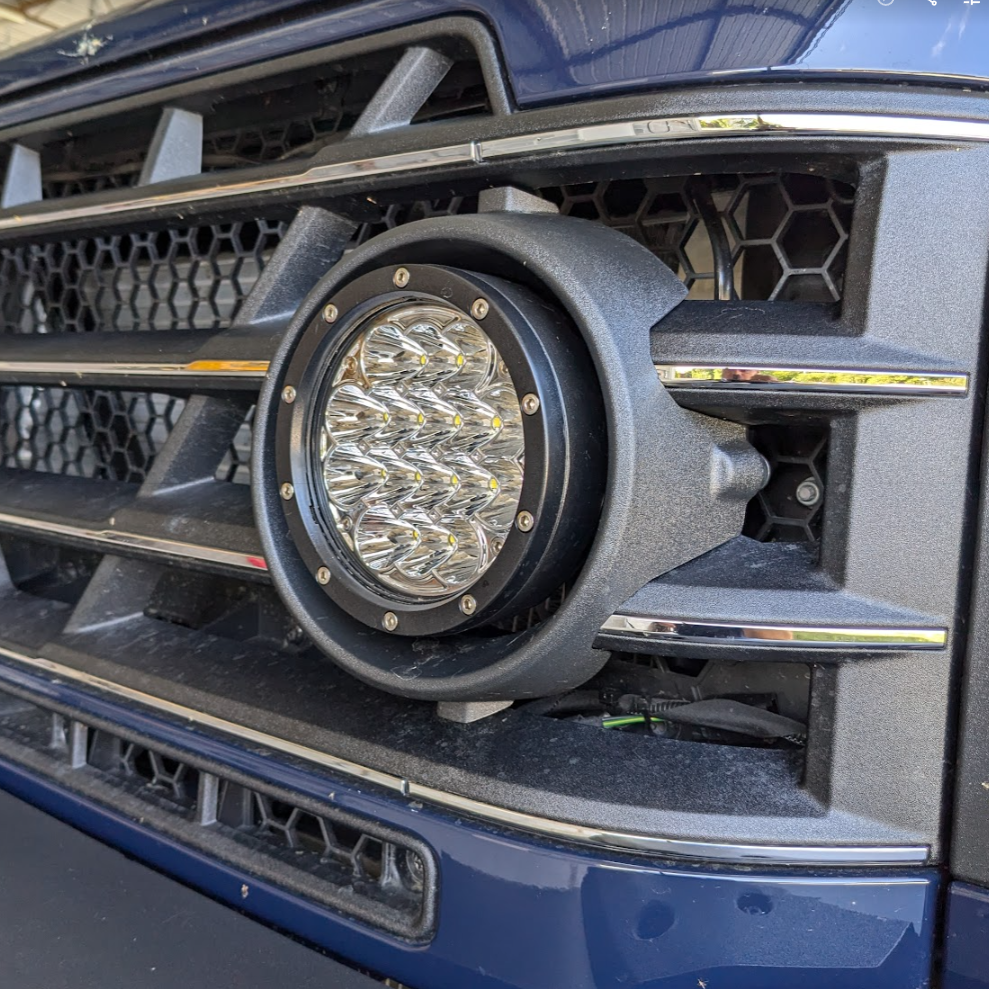
1. Attach Brackets to Pod Lights
The bent tabs on all brackets will point towards the front of the vehicle.
1a- The 4x M8 Screws pass through each mount bracket from the front so that threads point toward the back of the vehicle. Finger tighten the plastic spacers onto each screw. The raised edge of each spacer should face towards the rear of each light/bracket combo.
1b- Attach supplied brackets to LED pod lights using the hardware provided by the light manufacturer. Fully tighten hardware so that the light face is parallel to the main bracket plane.
Notes:
- In some cases, the vehicle round bezel will not fit over the LED light pod from the front after the light is installed in the grill. In this case the bezel must be positioned between pod light and bracket prior to attaching the light to the bracket. Note that vehicle bezels are Left-Hand and Right-Hand specific.
- In some cases it may be possible (but rarely necessary) to 'aim' the lights within the mount bracket using the light mount hardware. This adjustment will usually not be accessible after light is installed in the vehicle grill.
2- Loosen the vehicle grill, tilt it forward, and remove the round bezels and stock Aux lights according to the method shown here:
View: https://www.youtube.com/watch?v=yb-1V2pVd3Y
Tips:
- There are over 30 screws removed in this step. Take care to note fastener positions, as some vary only by length and can be mixed up. Consider bagging or otherwise labeling hardware.
- The 4x small screws at the top of the grill are actually plastic clips secured with plastic torx screws. To remove screw, apply downward pressure to the edges of each clip while loosening the screw inside. Remove the screw then carefully pry out the clips. To reinstall, align the holes, place all 4 clips, then hand-tighten the plastic screws into each clip.
- Minimize flexing of the grill lower mounts as you tilt it forward to gain access to the back of the grill. Do not tilt the grill further than necessary.
3- Remove the rubber grommets that locate the stock aux lights.
Tip to avoid mangling the grommets: Reach behind the grill with one hand and grab the rubber grommet, then pull it at an angle while simultaneously using a small flat head screwdriver to push the flange end into the hole from the front. This may allow grommets to be removed in one piece. Good luck with that. You won't need them again anyway.
4- Complete your wiring according to your desired control setup and vehicle spec. Run wires or light connectors to location immediately behind the aux. light buckets.
5- Attach Pod Light Assembly using brackets
5a- Plastic spacers must be in place between the brackets and the grill buckets. The small protrusions sticking out of the spacers face towards the grill buckets and will fit inside the 4 large holes in each bucket that previously held the rubber grommets. These spacers provide accurate positioning of the light. Make sure to hand-tighten the spacers firmly in place on the 4x SS screws.
5b- Fit the light pod/bracket assembly into place. Confirm that the assembly is fully seated into the grill bucket on all 4 spacers.
5c- With the grill loosened and tilted forward, reach behind and thread the 4x serrated flange nuts onto the 4x SS screws. The threads of the screws should protrude through the nuts slightly at all 4 locations. If they do not, then the spacers may not be fully seated in their holes and the lights may not be aimed correctly.
5d- Fully tighten the flange nuts. The hand-tightened spacers will help keep the M8 screws from rotating. If necessary, keep the screws from rotating using a ball-end hex key (if accessible).
6- Complete final wiring connections as desired. Confirm proper function of the lights before grill reassembly. Secure wiring to avoid contact with sharp edges or hot radiator.
7- Re-assemble the round bezels, tightening screws from the back side of the grill using the original hardware. Re-attach the vehicle grill according to the method shown in the video above.
8- Post about your victorious results on the forum.
Fits great and fast delivery all the way to South Africa
The brackets larger holes had to be drilled a little to fit my lights. It is more probable that the lights don't have good consistency with the hole spacing.
Good kiti atructiobs could havebeen more detailed but once job started was quite intuitive
Kit was excellent quality and everything fitted as designed.
However, you need to align light correctly to get maximumgeam alignment
Very pleased with kit, delivery and quality of components
Exactly what many of us were looking for, at an affordable price.